Stuffed Animal drawing
Part one: Drawing tecniques
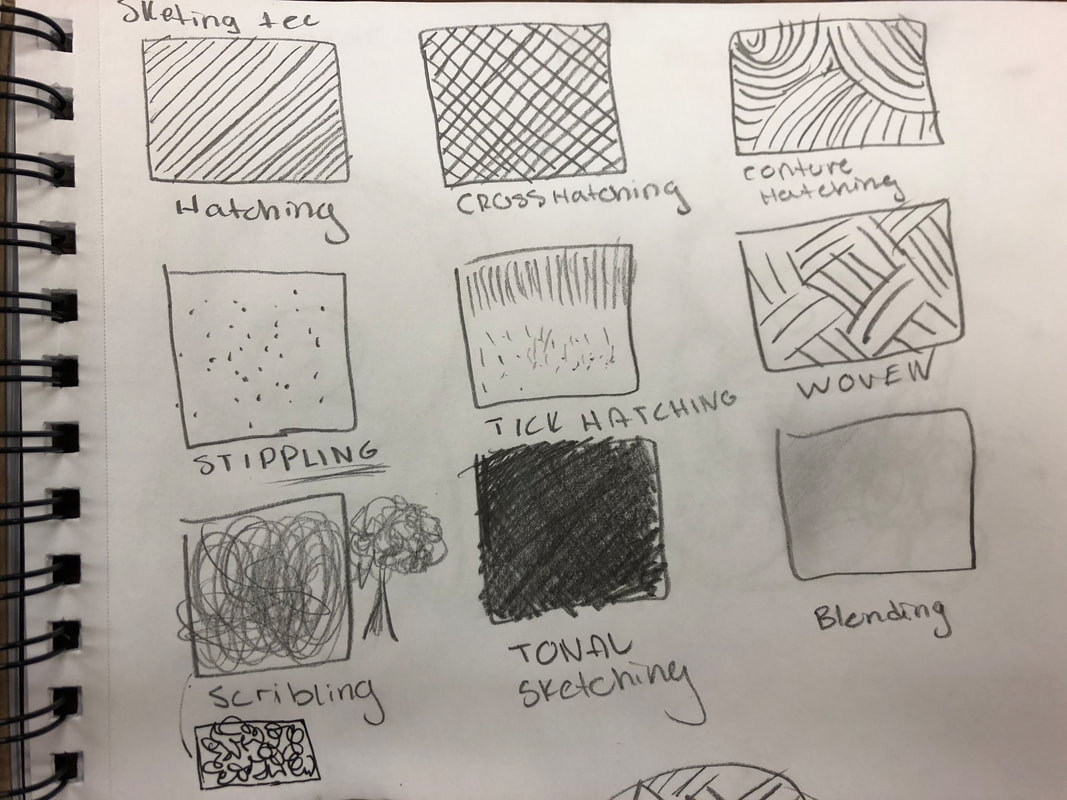
In class, we practiced 8 different drawing tecniques.
These tecniques are to help show you how many ways a change in pattern, a change in pencil movment or pressure can affect the look of the picture. It changes the value (how dark or light something is) and changes how the texutre appears giving the picture a look of a feeling or of movement. The power of the pencil!
If you haven't done this already, try drawing 8 squares (about the size of two erasers pushed together) and giving these tecniques below a shot. While your drawing, think: what does this remind me of? What could I draw using this technique? What texture does this show?
Part two: Shape

|
|

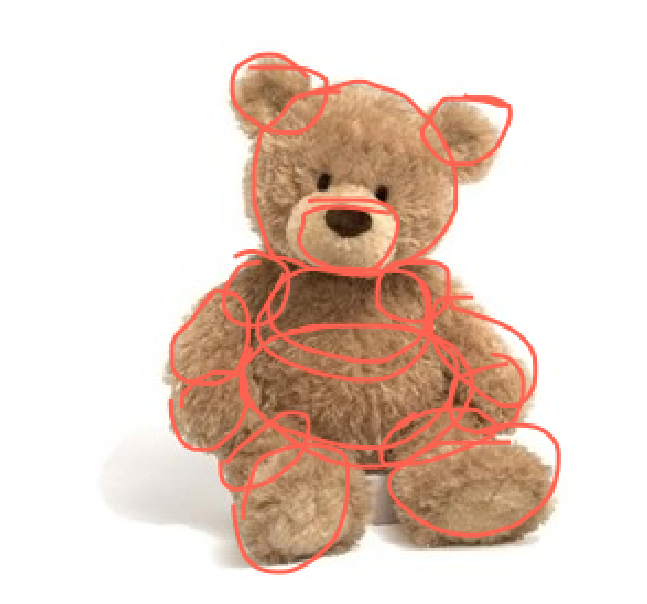
Imagine underneath your stuffed animal's fur, fluff is 3D wood pieces that fit together to create a movable shape of the animal.
Much like a wooden drawing mannequins, focus on how each part of the body changes shape and how they fit into one another.
On your paper, practice drawing the stuffed animal AS YOU SEE IT (from your seated perspective, without moving it) as just a series of shapes overlapping eachother, as if you are drawing those 3D wood pieces. Do not draw what you can't see, even if you know it is there (i.e. in this picture above of the bear, you know he has a tail - but you can't see it. So don't draw it!)
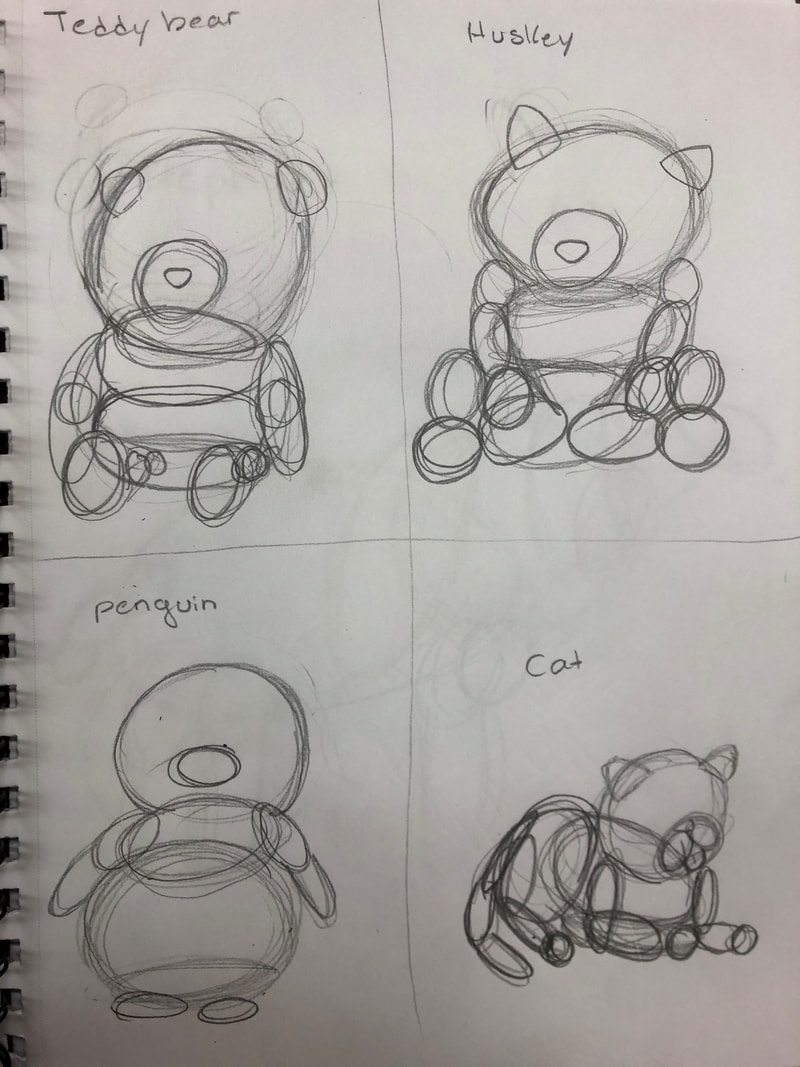
Practice. Practice again. Practice A LOT until your sketch looks like a "mannequin" of your stuffed animal waiting to be covered with fur.
Ignore details, ignore eyes, colour changes and manes - all you need to focus on is the SHAPE of the body of your animal. Keep going until it looks just as it does in front of you.
Much like a wooden drawing mannequins, focus on how each part of the body changes shape and how they fit into one another.
On your paper, practice drawing the stuffed animal AS YOU SEE IT (from your seated perspective, without moving it) as just a series of shapes overlapping eachother, as if you are drawing those 3D wood pieces. Do not draw what you can't see, even if you know it is there (i.e. in this picture above of the bear, you know he has a tail - but you can't see it. So don't draw it!)
Practice. Practice again. Practice A LOT until your sketch looks like a "mannequin" of your stuffed animal waiting to be covered with fur.
Ignore details, ignore eyes, colour changes and manes - all you need to focus on is the SHAPE of the body of your animal. Keep going until it looks just as it does in front of you.
Part three: Texture and Detail
Using the techniques from above and your own creations, focus on the direction of the fur and details. I want to see every single hair! Focus on the texture, how long the fur is, how coarse or soft or curly it is. I want to be able to "feel" it when I look at it! This should take a long time. We will have about 4 classes to complete an image. Remember, it should look real - like it could pop out of the page! Not flat.


